Why Precision Shaft Manufacturing Matters to You
You count on machines each day in your shop or plant. Those spindles turn without a snag. Attachments stay firm under pressure. Right at the center, you find the precision shaft. It moves power along. It cuts down shakes. It keeps your industrial gear going strong, shift by shift. You might work on CNC lathes or mills. Or other tools. A solid shaft cuts stoppages. It holds tight specs. And it lasts through tough jobs. Mess it up, though. Then you deal with bad fits. Quick breakdowns. Or total stops that kill your output.
Think about this. You dive into a big task. Deadlines press in. A bad shaft wrecks the plan. That’s when smart help flips things. If you hunt for a team that shapes hard specs into steady parts, check out Ruizheng. They stand as a top pick for tailored precision bits. Years of sharpening skills in machine tool add-ons and factory setups. They hand over shafts that match your setup spot on. Picture tiny accuracy down to microns. And stuff made for rough handling. Their crew hears your rough drawings or CAD plans. Then they build test pieces that feel like part of your kit. Nothing off-the-shelf here. It’s all geared to lift your work. And trim scrap. Peek at their background. You’ll get why field experts stick with them. It’s real. It’s tested. And it skips the pains later.
So, let’s go through it one bit at a time. You will spot how each part links to the one before. It turns fresh thoughts into bits you bank on for your machine tools and add-ons.
Step 1: Design and Planning—Your Blueprint Takes Shape
You kick off with a clear picture. A shaft that takes certain pulls in your spindle or drive setup. This part sets the base. Here, you jot down needs like width, length, and slots. Experts run models in programs. They test strains. And they check balance ahead.
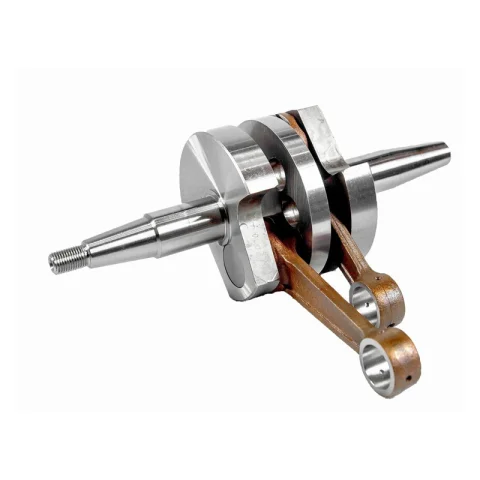
Shift easy to the next spot. Once the plan fits, you nail down facts that skip later fixes. Take a crankshaft for your factory press, for example. Aim at offset arms that trim shakes. This early push makes sure the shaft lines up just right with your gear’s beat.
Apps like 3D builders help you see matches fast. You catch snags before tools hit metal. And you tweak quick. You polish it till the plan hits your daily needs. The win? A piece that drops in easy. Set for the build ahead.
You pour time here because it pays off. Bad designs lead to rework. But good ones save hours. In your shop, that means more time on real jobs. Not fixes. So, lean on clear sketches. And solid sims. They guide you straight.
Step 2: Material Selection and Preparation—Choosing What Fits Your Needs
Your plan is locked. Now you grab stuff that suits the task. Tough alloy steels work great for shafts in mill add-ons. They stand up to steady twists. Pick stainless for spots with rust risks. Like damp work areas.
Next up, you ready it. Slice blocks to basic cuts. Then soften with annealing. This makes cuts later go smooth. You check for breaks now. Tools like sound waves spot deep flaws.
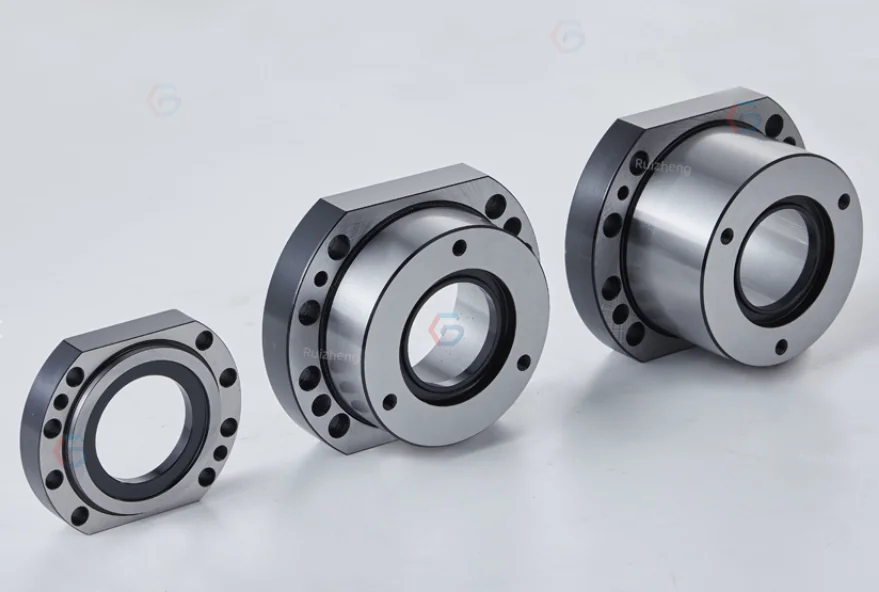
Tie this to hands-on spots. Picture a bearing housing that backs your spindle at fast turns. Custom Bearing Housing Processing Service picks stuff that fights side pushes. Without bending. You get staying power that stretches check times. So your gear stays live longer.
Why count this? Smart picks mean shafts that fight wear in repeat loops. It links right to your make goals. Ready well. And the rough cut flows clean. No shocks.
You might wonder about costs here. But top picks cut long-run bills. Weak stuff breaks soon. Strong holds up. In your daily grind, that’s cash saved. And less hassle.
Step 3: Rough Machining—Forming the Core Structure
You head to rough cuts now. The block turns into a shaft you know. CNC turners spin it quick. They shave off extra with hard tools. You dial speeds and pushes. To clear bulk fast. But leave room for fine work.
Then you drill and mill. Add slots or teeth. Machines with many arms tackle odd shapes. They keep lines straight from go. Cool stuff sprays on cuts. To hold heat down. No twists.
Pull from the ready work. That soft stuff now bends to exact tracks. It trims time by hitting big clears first. In a crankshaft for your gear pull, this sets arm balance early. Less shakes in the end fit.
You eye specs close. Shoot for under 0.1mm off. It’s the path to polish. Nail the form. And heat boosts it sans bends. This keeps bills low. While you scale up lots.
Watch the chips fly here. It’s noisy. But fun. You learn the machine’s hum. And feel the build grow. Each pass shapes your idea closer. To real metal you touch.
Step 4: Heat Treatment and Surface Hardening—Building Lasting Strength
Rough shape done. You hit it with heat to shift traits. Quick cool hardens deep. Slow warm adds bend so it won’t snap. Skin hardens deep in. For a hard coat over soft core.
Ovens nail temps tight. Like 850°C to set grains. Then oil dip. You watch for flat heat. Lumps make soft spots.
Link from the cut phase. That base form stays put through rounds. So boosts hit wear parts like spin spots. For bearing housings in your tool grabs, this fights scratches. Lets you hit top speeds.
What comes out? Shafts good for tons of loops in factory squeezes or lathe frames. You sense it in slick runs. And fewer swaps. It hooks to more run time.
Don’t skip checks after. Heat can stress bits. But right steps keep it sound. In your setup, that means trust. You run hard. Without worry.
Step 5: Finish Machining and Inspection—Polishing to Perfection
Time to shine it up. Grind stones trim widths to end marks. Often shy of 0.005mm gap. Smooth bores with hones. Lap for glass looks on rub spots.
Checks lock it. Scan tools map every size. Flag slips. You grab calipers for circle checks. And poke testers for skin strength.
Hook to the hard boost. That tough base now gets sharp edges. Checks prove no splits from heat. Think a custom crankshaft in your spindle pull. Crankshaft Custom Machining tests balance to G2.5 level. For hush runs in your add-ons.
You log all. For trace backs in reviews. This spot hits your top fear. Will it slot and work? Yep. Twin looks snag probs soon. No redo cash.
Breathe easy here. The part’s near done. You hold it. Feel the weight. See the gleam. It’s yours now. Ready for the line.
Step 6: Surface Treatment and Packaging—Final Protection for Delivery
Coat the skin to guard from world hits. Rust blockers like phosphate. Or shine layers like chrome for rub fight. You dunk or spray steady. Bake to set.
Pack seals the deal. Soft pads and tight wraps stop bumps in hauls. Tags spell care. So your crew pulls it out calm.
From check’s tight work, this adds years. A skinned shaft in wet shops fights fade. Stretches days in machine feet. You get bits set to mount. No extra prep.
It wraps the chain. Your shaft lands tough. Back to plan’s goal. Less stock mess. Quick slot into your flow.
You smile at the box. It’s clean. Labeled right. Open it. And there it is. Flawless. Eager for your bench.
Wrapping It Up: How These Steps Elevate Your Operations
You walked the path full. Saw each link weave to hand shafts that fuel your machine tools and factory bits. From sketch to sealed pack. It’s spot-on match to your calls. Snug slots. Long hauls. Slick spins.
These ways pop in tailors. Like bearing housings that steady your spindles. Or crankshafts that pull add-ons without hitch. You win from less shakes. That drops buzz and rub in your routine push. On top, smooth paths mean fast flips. So you hit marks sans extra shifts.
What if you tweak for your shop? Say, add a groove here. Or shift a length there. The steps flex. You stay in charge.
Ever hit a snag mid-build? These checks catch it. You fix small. Not big halts.
Ready to roll this out? Full-stop help spans test builds to big lots. With back-up that hits close. Drop a line for bids or talks. Shoot an email. Or tap the page. Let’s shape bits that keep your machines purring.
In the end, it’s simple. Good shafts mean good days. You focus on craft. Not breaks. That’s the real lift.
FAQ
Q: How long does the full precision shaft manufacturing process typically take?
A: It shifts with the job’s twist. But plan 4-8 weeks from sketch to drop for usual batches. Quick paths halve that for tests. Keeps your work steady.
Q: What tolerances can I achieve in custom shaft machining?
A: Lots of bits nail ±0.005mm on key spots. Grind shoves to ±0.001mm. Makes sure your spindles and add-ons line up tight. No fusses.
Q: Are there options for eco-friendly materials in shaft production?
A: Sure. Re-use metals and clean coats keep it kind. You land tough bits that fit green aims. Sans drop in factory punch.

